4 Yoga Moves to Lose Weight in Your Lower Belly
![]()
Yoga moves can help to lose weight in your lower belly. Here you will discover 4 proven yoga moves that you can start exercising starting from today and reduce the lower belly.
1. Rock n’ Roll Lotus

To do this move, start by sitting on the floor with your legs crossed at your ankles, then extend your right hand to hold your left ankle and the left hand to hold the right ankle.
Once you have done that, attempt to raise your legs above the floor (with your hands still on them), balancing the rest of your body on your buttocks.
Then, take a depth breath in, round your back and roll on the floor till your shoulder blades are on the floor while your hands are still on your ankles.
2. Tree Pose

Stand firmly on the floor with your legs more than a shoulder width-apart, then bend one of your knees and raise that foot, placing it at the side of the thigh of the other leg.
Once you have firmly attained this position, bring your hands together and upwards towards your chest and join your palms together (as in a praying sign).
Then hold this pose and brace your abdominal muscles, pushing your stomach in as far as you can go, but ensure that you are still breathing in a normal pattern throughout.
Hold this pose for 5-7 minutes and then rest.
https://www.youtube.com/watch?v=Fr5kiIygm0c
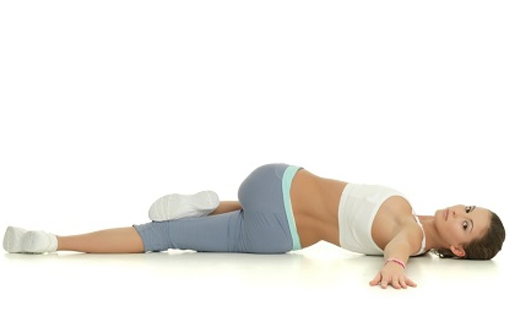
3. U-Boat

This move has also proven to be highly effective in losing weight in your lower belly. You can perform this pose by sitting down on the floor and bending your knees and your feet flat on the floor, then lean backwards and let your elbows touch the floor to support your upper body as you lean.
However, you should remain above the floor and straight. Once you have managed to attain this position, tightly prop in your abs and then raise your legs without your knees touching, to a 90o angle.
Hold this position for 5 seconds, then lower your legs and keep repeating the move, each time moving your legs further up.
While performing this pose, it is advised to ensure that your back is well rested on your elbows, so as not to put unnecessary strain on your back.
4. Reverse Plank Hover

Start by sitting down on the floor and straighten your legs forward, then let your hands be outside, as in besides your hips.
Then slightly bend your knees and lift up your upper body by creating a thrust as you push from your hands on the floor, but ensure that your heels remain on the floor and brace in your abs as you inhale and exhale.
Image courtesy of: yogajournal.com, stylepresso.com, thehealthyapron.com,