Day 4 of the 10-Day Pilates Challenge: Intermediate Abs Workout
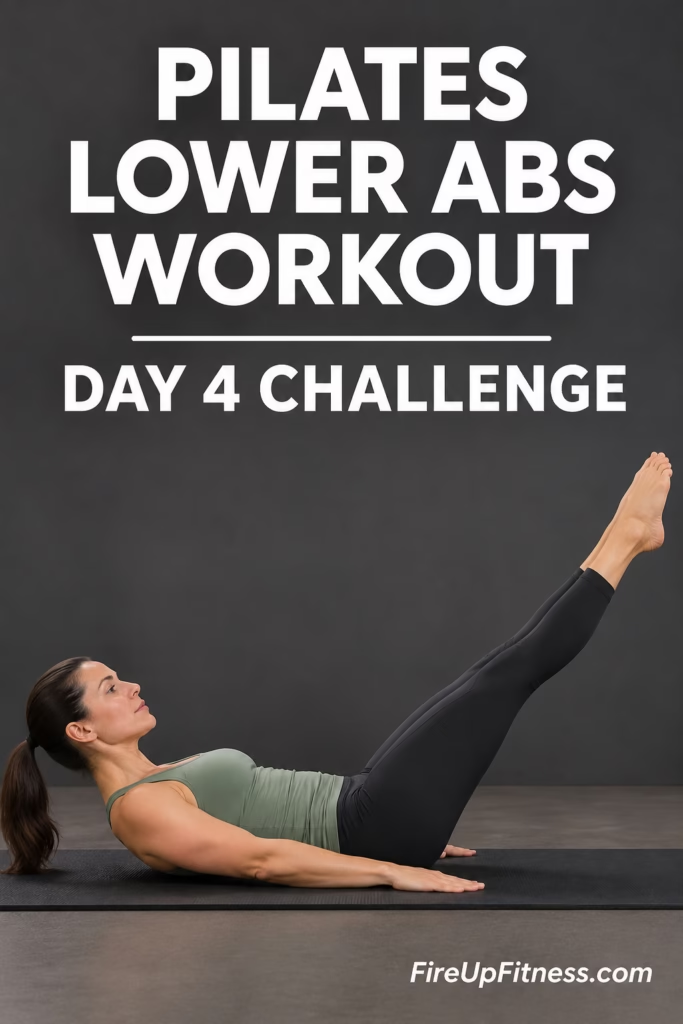
Welcome to Day 4 of our 10-Day Pilates Challenge! Today, we’re giving our core some extra attention with an intermediate Pilates abs workout designed to build strength, improve stability, and develop better control over every movement.
You’ve already made it through the first three days of the challenge, and that’s something worth celebrating. Each workout is an opportunity to become more comfortable with Pilates, improve your technique, and build a consistent movement routine.
Today’s session focuses on your deep abdominal muscles, obliques, and lower abs through a combination of seated exercises, planks, side-lying movements, and floor-based Pilates exercises.
Unlike workouts that rely on fast repetitions, this routine emphasizes slow, controlled movements, steady breathing, and proper alignment. You’ll learn how to engage your core while keeping your shoulders relaxed, your spine supported, and your movements intentional.
This is an intermediate-level workout, so some exercises may feel challenging, particularly the plank series and lower abdominal movements. Take breaks when needed, adjust your range of motion, and focus on maintaining good form.
All you need is an exercise mat and a little space to move.
Let’s get started with Day 4!
What to Expect From Today’s Pilates Abs Workout
Day 4 is dedicated to strengthening the muscles that support your spine, pelvis, and everyday movements.
The workout combines several Pilates techniques to challenge your core from different positions.
Today’s workout includes:
- Workout level: Intermediate
- Equipment: Exercise mat
- Focus: Deep core, lower abs, obliques, and stability
- Workout style: Mat Pilates with controlled movements
- Structure: Seated exercises, side-lying movements, planks, and supine exercises
- Cool-down: Gentle stretches for the lower back, hips, and thighs
The goal isn’t to rush through as many repetitions as possible. Instead, you’ll concentrate on how your body moves, how your abdominal muscles respond, and how well you can maintain control.
Benefits of This Intermediate Pilates Core Workout
Pilates works your abdominal muscles in ways that go beyond traditional crunches.
Throughout today’s session, you’ll practice keeping your torso stable while moving your arms and legs, rotating through your waist, and supporting your body in plank positions.
1. Strengthens Your Deep Core Muscles
Your deep abdominal muscles help stabilize your spine and pelvis during movement.
Exercises such as the half roll back, bent-knee teaser hold, and Pilates hundred encourage you to engage these muscles while controlling your breathing.
2. Builds Stronger Obliques
Your obliques run along the sides of your abdomen and assist with rotation, side bending, and torso stability.
Today’s spinal twists, side-lying crunches, and side planks challenge these muscles through different movement patterns.
3. Improves Core Stability
Core strength isn’t only about moving your torso. It’s also about resisting unwanted movement.
During plank toe taps and alternating leg exercises, your abdominal muscles work to keep your pelvis and spine steady.
4. Supports Better Posture
A stronger core can help support your spine during sitting, standing, and everyday activities.
Pilates also encourages awareness of shoulder placement, rib cage alignment, and pelvic positioning.
5. Develops Better Movement Control
Slow Pilates exercises give you time to notice how your body responds.
By coordinating each movement with your breathing, you can improve body awareness and develop more precise movement patterns.
Follow Along: Day 4 Pilates Abs Workout Video
Ready to strengthen your core? Follow along with the Day 4 workout video below as we move through seated Pilates exercises, oblique movements, challenging plank variations, and lower abdominal exercises.
The instructor demonstrates each movement and provides helpful guidance on breathing, posture, and proper technique.
You can pause the video whenever you need a break or extra time to adjust your position. Focus on controlled movements rather than rushing through the exercises.
Once you’ve finished, use the step-by-step exercise guide below to revisit your favorite movements or review the proper form for each exercise.
Day 4 Pilates Workout: Step-by-Step Exercises
Follow along with the YouTube workout video included in this post. The instructions below will help you understand each movement and remember the important form cues.
Part 1: Seated Pilates Core Exercises
We begin in a seated position to activate the abdominal muscles and prepare the body for the more challenging exercises ahead.
1. Pilates Half Roll Back
The half roll back is a controlled movement that works your abdominal muscles while encouraging spinal mobility.
How to do it:
- Sit on your mat with your knees bent and feet hip-width apart.
- Lengthen your spine and extend both arms forward.
- Exhale as you gently tuck your tailbone and roll your pelvis backward.
- Round through your lower spine to create a C-shaped curve.
- Lean back only as far as you can while maintaining abdominal control.
- Inhale as you return to an upright seated position.
Keep your collarbone wide and shoulders relaxed rather than rounding your entire upper body forward.
Pilates tip: Imagine drawing your ribs toward your hips as you lean back. The movement should come from your abdominal muscles rather than momentum.
2. Seated Spine Twist With Roll Back
Next, we add rotation to challenge the obliques.
How to do it:
- Begin in the same seated position.
- Lean back into a controlled C-curve.
- Reach both arms overhead.
- Exhale as you rotate your torso and reach your hands toward one side.
- Inhale as you return your arms toward the ceiling.
- Rotate to the opposite side and continue alternating.
Keep your hips steady throughout the exercise.
The rotation should come primarily from your waist and upper torso rather than shifting your pelvis from side to side.
3. Bent-Knee Teaser Hold
The Pilates teaser is a challenging core exercise. This bent-knee variation allows you to focus on balance and stability.
How to do it:
- Sit with your knees bent and feet on the mat.
- Lean your torso slightly backward while engaging your abdominal muscles.
- Lift one leg into tabletop position.
- Bring the other leg up so both shins are parallel to the floor.
- Keep your chest open and shoulders relaxed.
- Hold the position while breathing steadily.
Avoid collapsing through your chest or holding your breath.
Modification: Keep one foot on the mat while lifting the other leg if balancing both legs feels too difficult.
Part 2: Side-Lying Pilates Oblique Exercises
Now we’ll move onto our sides to work the muscles along the waist.
4. Side-Lying Oblique Crunch — Right Side
This movement combines a leg lift with a controlled side crunch.
How to do it:
- Lie on your right side with your right elbow underneath your shoulder.
- Extend both legs slightly forward of your hips.
- Angle your body slightly toward your right glute.
- Reach your left arm overhead.
- Exhale as you lift both legs and reach your left hand toward your top foot.
- Inhale as you lower your legs and lengthen your body.
Keep your chest open and avoid sinking into your supporting shoulder.
5. Side-Lying Oblique Crunch — Left Side
Repeat the same movement on your left side.
Duration: 30 seconds.
Focus on lifting through your waist while keeping both legs long and your upper body supported.
Move slowly enough to feel your abdominal muscles controlling the movement rather than swinging your legs.
Part 3: Pilates Plank Series for Core Stability
The next section introduces a series of plank exercises.
These movements challenge your abdominal muscles, shoulders, and overall stability.
6. High Plank Hold
<underline>Duration: 30 seconds</underline>
How to do it:
- Place your hands on the mat directly beneath your shoulders.
- Extend both legs behind you.
- Engage your abdominal muscles and gently tuck your pelvis.
- Press firmly through your palms and fingertips.
- Keep your body in a straight line from your head to your heels.
- Hold while breathing normally.
Avoid allowing your lower back to sag or lifting your hips too high.
Modification: Lower your knees to the mat while maintaining a long line from your head to your knees.
7. High Plank Side Toe Taps
This exercise challenges your ability to keep your pelvis stable while moving one leg at a time.
How to do it:
- Begin in a high plank position.
- Move your right foot out to the side and lightly tap the floor.
- Return your right foot to the starting position.
- Repeat with your left foot.
- Continue alternating sides.
Duration: Approximately 60 seconds.
Imagine balancing an object on your lower back. Your goal is to keep your hips as still as possible.
Take a brief rest whenever your form begins to change.
8. Cross-Body Knee-to-Elbow Plank
This movement combines core stability with a gentle rotational crunch.
How to do it:
- Start in a high plank.
- Exhale as you bring your right knee toward your left elbow.
- Return your right leg to plank position.
- Bring your left knee toward your right elbow.
- Continue alternating sides.
Keep your shoulders positioned above your wrists and avoid rushing.
Draw your ribs toward your hips as your knee travels underneath your torso.
Once you’ve completed this series, sit back into child’s pose for a few comfortable breaths.
Part 4: Side Plank Exercises for Stronger Obliques
Side planks strengthen the muscles that help stabilize your torso and pelvis.
9. Right Side Plank Hold
<underline>Duration: 30 seconds</underline>
How to do it:
- Position yourself on your right side.
- Place your right hand directly beneath your shoulder.
- Extend your legs with your left foot slightly in front of your right.
- Press through your supporting hand and lift your hips.
- Reach your left arm toward the ceiling.
- Maintain a long line through your body.
Keep your hips elevated and your chest open.
10. Right Side Plank Hip Pulses
From your right side plank:
- Lower your hips a few inches toward the mat.
- Exhale as you lift them back up.
- Continue with small, controlled pulses.
Initiate the movement from your hips rather than pushing excessively through your shoulder.
11. Left Side Plank Hold
<underline>Duration: 30 seconds</underline>
Repeat the side plank on your left side, with your right foot slightly in front of your left.
Keep your supporting wrist beneath your shoulder and avoid rotating your chest toward the floor.
12. Left Side Plank Hip Pulses
Finish the side plank series with controlled hip pulses on your left side.
Modification for the side plank series: Lower your bottom knee to the mat to reduce the intensity while keeping your torso supported.
Part 5: Pilates Lower Abs Workout
After the plank series, we’ll lie on our backs for a sequence that challenges the lower abdominal muscles.
These exercises require careful attention to pelvic positioning and lower back comfort.
13. Pilates Scissor Kicks
<underline>Duration: 60 seconds</underline>
How to do it:
- Lie on your back with your arms resting beside you.
- Gently draw your ribs downward and tilt your pelvis to create a supported lower back position.
- Extend both legs toward the ceiling.
- Slowly lower your right leg toward the floor.
- Lift it back up.
- Repeat with your left leg, alternating sides.
Inhale as you lift each leg and exhale as you lower it.
Keep your shoulders relaxed and your movements controlled.
Modification: Bend your knees slightly or reduce how far you lower each leg.
14. Scissor Kicks With Abdominal Crunch
This variation adds an upper abdominal crunch to the previous exercise.
How to do it:
- Lie on your back with both legs extended upward.
- Place your hands behind your head with your elbows wide.
- Gently lift your head and shoulders into a crunch.
- Support the weight of your head with your hands.
- Alternate lowering one leg at a time.
- Maintain your crunch without pulling on your neck.
Keep your elbows open and avoid pressing your chin into your chest.
Pilates tip: A smaller leg movement is perfectly fine. Prioritize a supported lower back and comfortable neck position.
15. Double Leg Lowers
This exercise increases the challenge by moving both legs together.
How to do it:
- Lie on your back with both legs pointing toward the ceiling.
- Keep your arms by your sides, palms facing down.
- Gently tuck your pelvis and engage your core.
- Exhale as you slowly lower both legs toward the floor.
- Inhale as you lift them back toward the ceiling.
Keep your shoulders heavy against the mat.
If your lower back begins to arch or feels uncomfortable, reduce your range of motion.
You don’t need to lower your legs close to the floor to make this exercise effective.
16. Pilates Reverse Crunches
<underline>Duration: 60 seconds</underline>
Reverse crunches emphasize controlled pelvic movement rather than large upper-body movements.
How to do it:
- Lie on your back with both legs extended toward the ceiling.
- Keep your arms resting beside your body.
- Exhale as you tuck your tailbone and gently lift your hips from the mat.
- Reach your feet upward toward the ceiling.
- Slowly lower your hips with control.
- Repeat without swinging your legs.
Think about curling your pelvis upward rather than kicking your feet overhead.
Keep the movement small and controlled.
17. Pilates Hundred
We finish today’s core workout with one of the most recognizable Pilates exercises: the hundred.
How to do it:
- Lie on your back with your knees bent into tabletop position.
- Keep your shins parallel to the floor.
- Gently lift your head and shoulders into an abdominal curl.
- Extend your arms alongside your body.
- Begin pumping your arms up and down in small, controlled movements.
- Inhale for five arm pulses and exhale for five pulses.
Keep your torso stable while your arms move.
The traditional hundred uses 100 arm pulses, although you should follow the pace and duration demonstrated in the video.
Modification: Keep your head resting on the mat or place your feet on the floor if your neck or abdominal muscles become fatigued.
Part 6: Pilates Cool-Down and Stretches
After completing the core exercises, take a few minutes to release tension and allow your breathing to settle.
18. Knee Circles
Lie on your back and hug both knees toward your chest.
Gently circle your knees in one direction before reversing.
This movement provides a comfortable way to relax your lower back after the abdominal exercises.
19. Prone Quadriceps Stretch
Lie on your stomach with your legs extended.
Bend your right knee and reach your right hand toward your right foot. Gently draw your heel toward your hip.
Keep your pelvis grounded and avoid arching your lower back.
Hold for a few comfortable breaths before switching sides.
This stretch targets the front of your thigh and can help release tension around the hip.
20. Child’s Pose
Finish in child’s pose.
- Kneel on your mat.
- Sit your hips back toward your heels.
- Reach your arms forward.
- Allow your torso to relax toward the mat.
- Take several slow, comfortable breaths.
When you’re ready, slowly return to an upright position.
You’ve completed Day 4!
Tips for Getting the Most Out of Day 4
Today’s intermediate workout introduces several challenging movements. A few simple adjustments can help you stay comfortable while improving your technique.
Focus on your breathing. Exhale during the more demanding portion of each movement and avoid holding your breath during planks or abdominal holds.
Keep your movements controlled. Moving slowly allows you to notice whether your core is doing the work or whether you’re relying on momentum.
Pay attention to your lower back. During scissor kicks and double leg lowers, reduce your range of motion if you cannot maintain a comfortable, supported position.
Relax your neck and shoulders. Avoid pulling your head forward during crunches or allowing your shoulders to collapse during planks.
Take breaks when necessary. You can pause the video, rest, and return when you’re ready. Quality movement matters more than completing every second without stopping.
Respect your current fitness level. Some exercises may feel easier than others. Adjustments are part of developing a sustainable Pilates practice.
How Often Should You Do This Pilates Abs Workout?
This routine is part of our 10-Day Pilates Challenge, where each day introduces a different workout focus.
You can follow the series in order or return to this core workout as a standalone session.
For a balanced fitness routine, combine abdominal training with exercises that strengthen your legs, glutes, back, and upper body.
Remember that your muscles also need time to recover. You don’t need to repeat a challenging abdominal workout every day to make progress.
Consistency, adequate rest, and good technique are more valuable than pushing through fatigue.
Can Beginners Try This Intermediate Pilates Workout?
Yes, but some exercises may need to be modified.
The half roll back, seated spine twist, and bent-knee teaser are useful opportunities to practice core engagement.
The plank series and double leg lowers may require more strength and stability.
Beginners can shorten plank holds, keep their knees on the floor, bend their legs during abdominal exercises, or take longer recovery breaks.
You can also revisit earlier workouts in the challenge to build confidence before returning to Day 4.
The most important thing is to choose a level that allows you to move comfortably and maintain proper form.
Frequently Asked Questions
Does Pilates help strengthen lower abs?
Yes. Exercises such as scissor kicks, double leg lowers, and reverse crunches challenge the abdominal muscles while emphasizing pelvic stability. The lower abs aren’t a separate muscle group, but these movements can help strengthen the abdominal region as a whole.
Are Pilates planks good for core strength?
Planks train your abdominal muscles to stabilize your spine while your arms and legs support your body. Side planks also challenge your obliques and lateral core stability.
Do I need Pilates equipment for Day 4?
No. This entire workout can be completed using an exercise mat. No dumbbells, resistance bands, or specialized Pilates equipment are required.
What should I do if my neck hurts during crunches?
Try supporting your head with your hands, reducing the height of your crunch, or keeping your head on the mat. Stop or modify any movement that causes pain.
Can I repeat Day 4 after finishing the challenge?
Absolutely. You can revisit this workout as part of your regular core-strengthening routine, allowing appropriate recovery between challenging sessions.
Day 4 Complete: Keep Building Your Pilates Strength
You’ve officially completed Day 4 of the 10-Day Pilates Challenge!
Today’s workout challenged your core through seated movements, rotational exercises, planks, and controlled lower abdominal exercises.
Some movements may have felt especially demanding, and that’s okay. Pilates is a practice that develops with repetition, patience, and attention to technique.
As you continue through the challenge, notice the smaller improvements. Perhaps you’re holding your plank with more confidence, controlling your leg movements more smoothly, or becoming more aware of your breathing.
Those changes matter.
Tomorrow, we’re moving on to Day 5: Intermediate Pilates HIIT Workout, where we’ll introduce a more energetic session while continuing to build on the strength and control you’ve been developing.
For now, enjoy the feeling of finishing another workout and give your body the recovery it needs.
Four days down, six more to go. See you on Day 5!